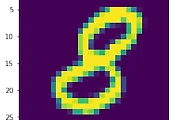
MNIST 데이터로 KNN 분류기, 성능 측정
MNIST 데이터는 머신 러닝 분야에서 광범위하게 사용되는 손글씨 숫자 0~9가 흑백으로 저장된 이미지
[데이터 다운로드]
http://yann.lecun.com/exdb/mnist/ ( train-images-idx3-ubyte.gz, train-labels-idx1-ubyte.gz, t10k-images-idx3-ubyte.gz, t10k-labels-idx1-ubyte.gz)
[입력을 도와주는 스크립트 다운로드]
https://github.com/tensorflow/tensorflow/blob/master/tensorflow/examples/tutorials/mnist/input_data.py
Python 스크립트와 동일한 폴더에 input_data.py 파일을 넣고, 데이터 파일들은 압축된 상태로 동일한 폴더내에 폴더를 만들어서 넣음
#MNIST데이터 손글씨 아라비아 숫자 0~9 데이터
#http://yann.lecun.com/exdb/mnist/ 에서 학습 데이터, 테스트 데이터 다운로드 가능
#데이터 input은 아래 스크립트 활용 https://github.com/tensorflow/tensorflow/tree/master/tensorflow/examples/tutorials/mnist
import input_data
import numpy as np
import tensorflow as tf
mnist = input_data.read_data_sets("./mnist_data", one_hot=True)
#100개 이미지 학습
train_pixels,train_list_values = mnist.train.next_batch(100)
#print(train_pixels)
#print(train_list_values)
#10개 테스트
test_pixels,test_list_of_values = mnist.test.next_batch(10)
print(test_list_of_values)
[[ 0.  0.  0.  0.  0.  0.  0.  0.  0.  1.]
 [ 0.  0.  0.  0.  0.  0.  1.  0.  0.  0.]
 [ 0.  0.  0.  0.  0.  0.  1.  0.  0.  0.]
 [ 0.  0.  0.  0.  0.  1.  0.  0.  0.  0.]
 [ 0.  0.  0.  0.  1.  0.  0.  0.  0.  0.]
 [ 1.  0.  0.  0.  0.  0.  0.  0.  0.  0.]
 [ 0.  0.  0.  0.  0.  0.  0.  1.  0.  0.]
 [ 0.  0.  0.  0.  1.  0.  0.  0.  0.  0.]
 [ 1.  0.  0.  0.  0.  0.  0.  0.  0.  0.]
 [ 0.  1.  0.  0.  0.  0.  0.  0.  0.  0.]]
#텐서 정의
train_pixel_tensor = tf.placeholder("float",[None,784])
test_pixel_tensor = tf.placeholder("float",[784])
#비용함수 정의 텐서의 차원을 탐색하며 개체들의 총합 계산 _reduce_sum 함수: 텐서의 차원을 탐색하며 개체의 총합 계산
distance = tf.reduce_sum(tf.abs(tf.add(train_pixel_tensor,tf.negative(test_pixel_tensor))),reduction_indices=1)
#reduce_sum
#x=[[1,1,1],[1,1,1]]
#tf.reduce_sum(x) -> 6
#tf.reduce_sum(x,0) -> [2,2,2]
#tf.reduce_sum(x,1) -> [3,3]
#tf.reduce_sum(x,1,keep_dims=True) -> [[3],[3]]
#tf.reduce_sum(x,[0,1]) -> 6
#비용함수 최소화를 위해 arg_min 사용 가장 작은 거리를 갖는 인덱스 리턴(최근접 이웃)
pred = tf.arg_min(distance,0)
accuracy=0
init = tf.global_variables_initializer()
with tf.Session() as sess:
sess.run(init)
for i in range(len(test_list_of_values)):
nn_index = sess.run(pred, feed_dict={train_pixel_tensor:train_pixels, test_pixel_tensor:test_pixels[i,:]})
print("Test No. ",i,"Predict Class: ",np.argmax(train_list_values[nn_index]),"True class: ",np.argmax(test_list_of_values[i]))
if np.argmax(train_list_values[nn_index])==np.argmax(test_list_of_values[i]):
accuracy+=1.0/len(test_pixels)
print("Result Accuracy =",accuracy)
Test No.  0 Predict Class:  3 True class:  3
Test No.  1 Predict Class:  1 True class:  1
Test No.  2 Predict Class:  3 True class:  3
Test No.  3 Predict Class:  6 True class:  4
Test No.  4 Predict Class:  7 True class:  7
Test No.  5 Predict Class:  2 True class:  2
Test No.  6 Predict Class:  7 True class:  7
Test No.  7 Predict Class:  1 True class:  1
Test No.  8 Predict Class:  2 True class:  2
Test No.  9 Predict Class:  1 True class:  1
Result Accuracy = 0.8999999999999999
3번째 테스트에서 실제 값 4를 6으로 예측해서 정확도가 떨어졌다.
출처: 텐서플로 입문 _ 잔카를로 자코네
'Data > TensorFlow' 카테고리의 다른 글
| Tensorflow Object Detection API _ CentOS7 설치 (1) | 2017.08.18 |
|---|---|
| k-means clustering 군집화 (0) | 2017.04.17 |
| MNIST 데이터 집합 읽어오기, 이미지로 나타내기 (1) | 2017.04.14 |
| 선형 회귀 알고리즘 구현, 비용함수, 경사하강법 (0) | 2017.04.14 |
| 편미분 방정식으로 물결 파동 표현하기 (1) | 2017.03.21 |


